
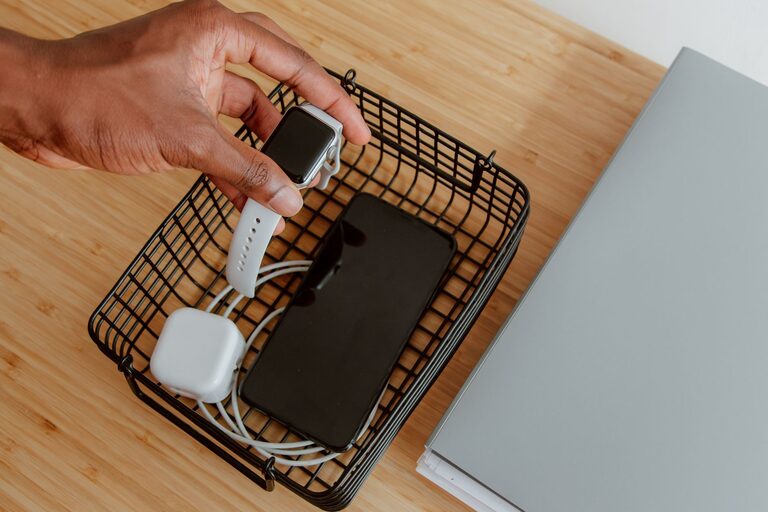
Setting up a dedicated charging station for your devices is a simple way to keep your gadgets organized and ensure they are always ready to go. Whether you have smartphones, tablets, laptops, or other rechargeable items, a central charging station can reduce clutter and streamline your daily routines. In this guide, we will walk you through the steps to create an efficient and safe charging station at home.
Why Set Up a Charging Station?
With so many devices in most households, charging cables can quickly become tangled and scattered. A charging station helps by:
– Keeping cables and devices organized in one spot
– Reducing the risk of lost chargers
– Preventing clutter on desks, nightstands, or kitchen counters
– Protecting devices by providing proper ventilation
– Making it easy to monitor charging status
Once you have a designated space, you’ll save time and frustration looking for chargers or free outlets.
Step 1: Choose the Right Location
Select a spot that is:
– Easily accessible to everyone who needs to charge devices
– Near a power outlet or multiple outlets
– Well-ventilated and away from direct sunlight or heat sources
– On a stable surface to prevent devices from falling or getting damaged
Common locations include a kitchen counter, home office desk, or a dedicated shelf in a living room or bedroom.
Step 2: Gather Necessary Supplies
Before setting up, gather the following items:
– Charging station organizer or docking station: These come in various sizes and designs, some with multiple USB ports and cable management features.
– Power strip with surge protection: To safely accommodate several chargers at once.
– Charging cables: USB-C, Lightning, Micro-USB—choose based on your devices. Consider extra-long cables if your outlet is far from the station.
– Cable organizers: Clips, ties, or sleeves to keep cords untangled and neat.
– Labels (optional): To mark which cable belongs to which device for easy identification.
– Small containers or trays: To hold smaller accessories like earbuds or charging adapters.
Step 3: Organize Your Devices and Cables
Start by sorting your devices based on charging needs and frequency of use. For example, keep your daily-use smartphones and tablets on top or in the most accessible spots. Reserve lower shelves or compartments for less frequently charged items.
Next, arrange your charging cables so they are easy to grab but not tangled. Cable clips attached to the side or back of your charging station can hold cables in place. Velcro wraps or zip ties can bundle excess cable length.
Step 4: Connect and Power Up
Plug your power strip into the wall outlet. Then, connect your charging cables to the power strip’s USB or AC ports, depending on the type of charger.
If your charging station organizer has built-in USB hubs or charging ports, connect it to the power strip for a clean setup.
Make sure that cables are not stretched too tightly and that devices, when plugged in, sit securely on the station.
Step 5: Maintain Safety and Efficiency
To protect your devices and your home, follow these safety tips:
– Use surge protectors to prevent damage from power spikes.
– Avoid overloading outlets or power strips.
– Keep charging stations away from water or damp areas.
– Allow airflow around devices to prevent overheating.
– Unplug chargers when not in use to save energy.
Additionally, periodically check cables and chargers for wear or damage and replace any faulty equipment.
Creative Ideas for Your Charging Station
Make your charging station visually appealing and customized to your space with one or more of these ideas:
– Use a decorative box or basket: Hide cables and chargers while adding style.
– Install a wall-mounted charging shelf: Great for small spaces.
– Add a small clock or plant: Combine functionality with decor.
– Incorporate wireless charging pads: For compatible devices, reduce the need for multiple cables.
– Label slots or charging ports: Help everyone in your household know where to plug in.
Benefits of a Well-Organized Charging Station
Once you set up your charging station, you’ll notice several benefits:
– Less clutter and more space on counters and desks.
– Faster and easier access to charged devices.
– Reduced cable and charger wear from proper storage.
– An attractive and functional addition to your home setup.
Conclusion
Creating a charging station at home is a straightforward project that brings order and convenience to everyday tech use. By choosing the right location, investing in the necessary tools, and organizing your devices thoughtfully, you can enjoy a clutter-free and efficient charging experience. Start simple, and adjust your setup over time to best fit your needs and lifestyle. Your devices—and your peace of mind—will thank you!